Projects
Custom Domains
Add Custom Domain to your Project. It's incredibly simple to add a domain to your project.
Step 1 : Copy Server IP
Please select the server tab, then mouse over the IP address to reveal the copy option and copy the ip address.

Step 2: Go to your DNS Management panel
Now include your IP address in a "A" record. Leave the "Name" box empty if you plan on utilising this project to host your primary domain. If you wanted to utilise this project as a subdomain, you could enter subdomain name in the "Name" section.
Example 1:
Let's say you own the domain name example.com and want to use project to show visitors information. The IP address of Your server is "192.168.0.1."
Add a "A" record using the IP address you copied from our panel, leaving the name column empty. Here are your settings.
| Name | Type | TTL | Target |
|---|---|---|---|
| A | 3600 | 192.168.0.1 | |
| --- | --- | --- | --- |
Example 2:
Assume you intended to host this project on your "subdomain.example.com" subdomain. Here are your settings.
| Name | Type | TTL | Target |
|---|---|---|---|
| subdomain.example.com | A | 3600 | 192.168.0.1 |
| --- | --- | --- | --- |
Step 3: Park the Domain to a Project
Now You need to tell your project to accept and display site for your domain.
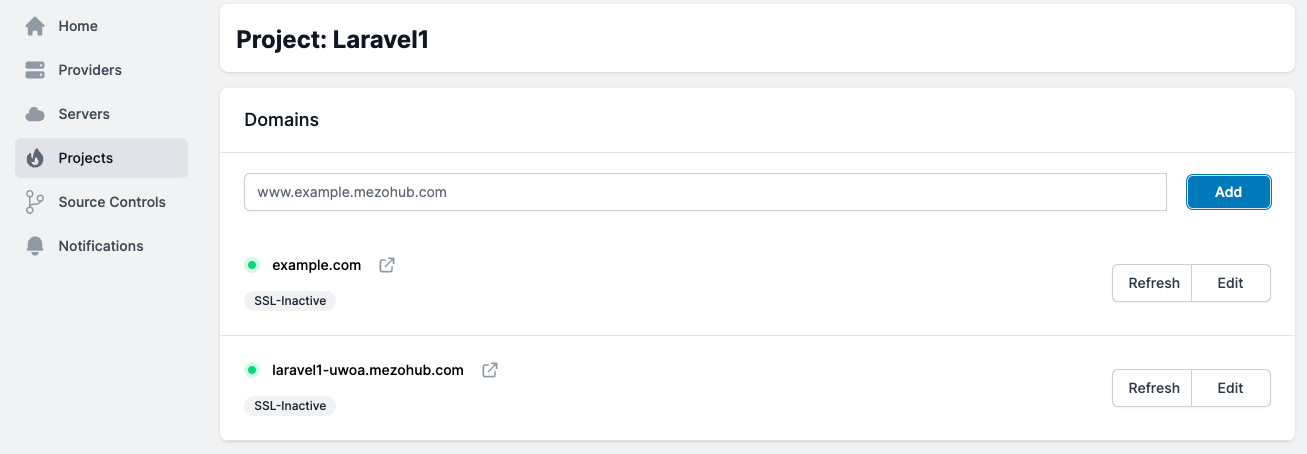
Goto Project > Domain Type your domain name and press add.

Install SSL CCertificate to your Domain

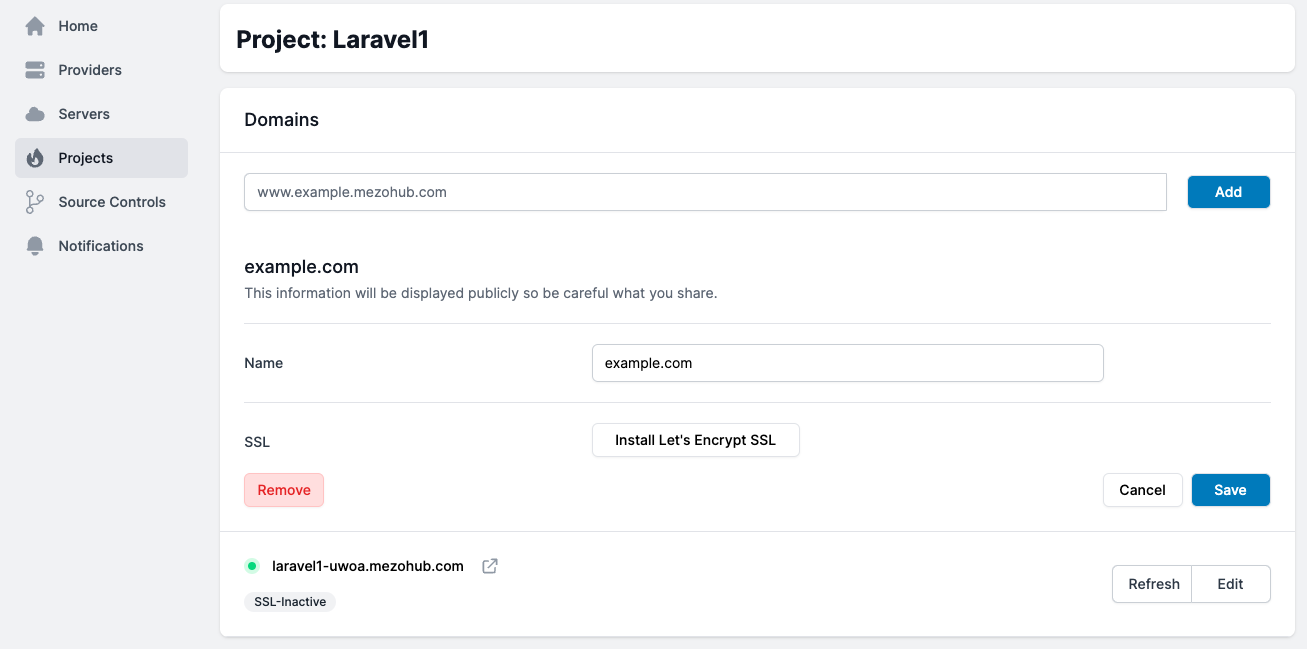
Please go to edit and click the "Install Let's Encrypt SSL" button to install SSL.

Note
Please be aware that to activate an SSL certificate, your domain must point to the IP address. Before installing SSL, please make sure your DNS has been updated.